The Custom Menu Editor allows you to create a branded navigation menu for your organization inside the Driftscape mobile and web apps. This menu helps visitors quickly access your key content, such as sublayers, points of interest, or external resources.
With a custom menu, you can:
Highlight important attractions or experiences
Organize content into clear categories
Link to websites, social media, or other external pages
Improve overall navigation for visitors
Custom menus can also be opened directly using a deeplink, making them ideal for QR codes, marketing materials, and campaigns.
Here’s what the custom menu and submenu can look like to users in the application:

When to Use a Custom Menu
Custom menus are ideal when you want to:
Organize multiple sublayers into a simple navigation structure
Highlight specific attractions or programs
Provide quick links to external resources
Create a branded, guided experience for visitors
Before You Begin
Make sure:
Your organization is set up in the Driftscape CMS
Your sublayers and key content are already created
You have access to the Org Properties section
How To Create a Custom Menu: Video Tutorial
Get Started: Creating a Custom Menu
Step 1: Access the Custom Menu Editor
Log in to the Driftscape CMS.
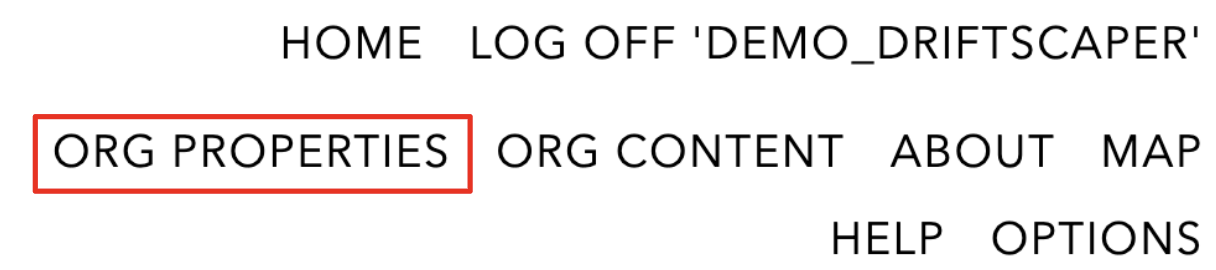
Select Org Properties from the top menu.
Click the pencil icon next to your organization.

Scroll down to the Custom Menu Editor section and click Expand.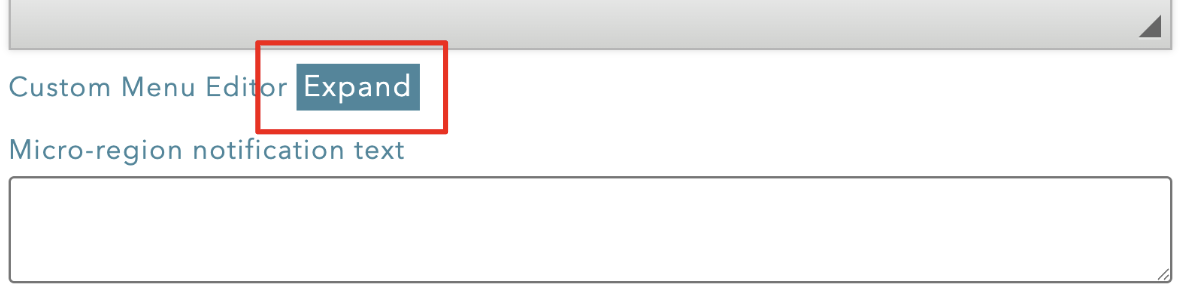
Step 2: Add Menu Settings
Fill in the menu settings:
Menu Version - Leave set to 1.
Background Image (optional)
Choose a portrait-oriented image.
Avoid images with text.
Use a high-resolution image for best results.
You can upload a file or use a public image URL.
Menu Item Background Color - Sets the default background colour for menu items.
Menu Item Font Color - Sets the default text colour for menu items.
Scroll to Menu:
Set to "yes" if you want Driftscape to scroll past your organization description to your menu.
Set to "no" if you want Driftscape to display your organization description first, with your menu below (users must scroll to see menu)
Click Create Menu (or OK if you are editing an existing menu)

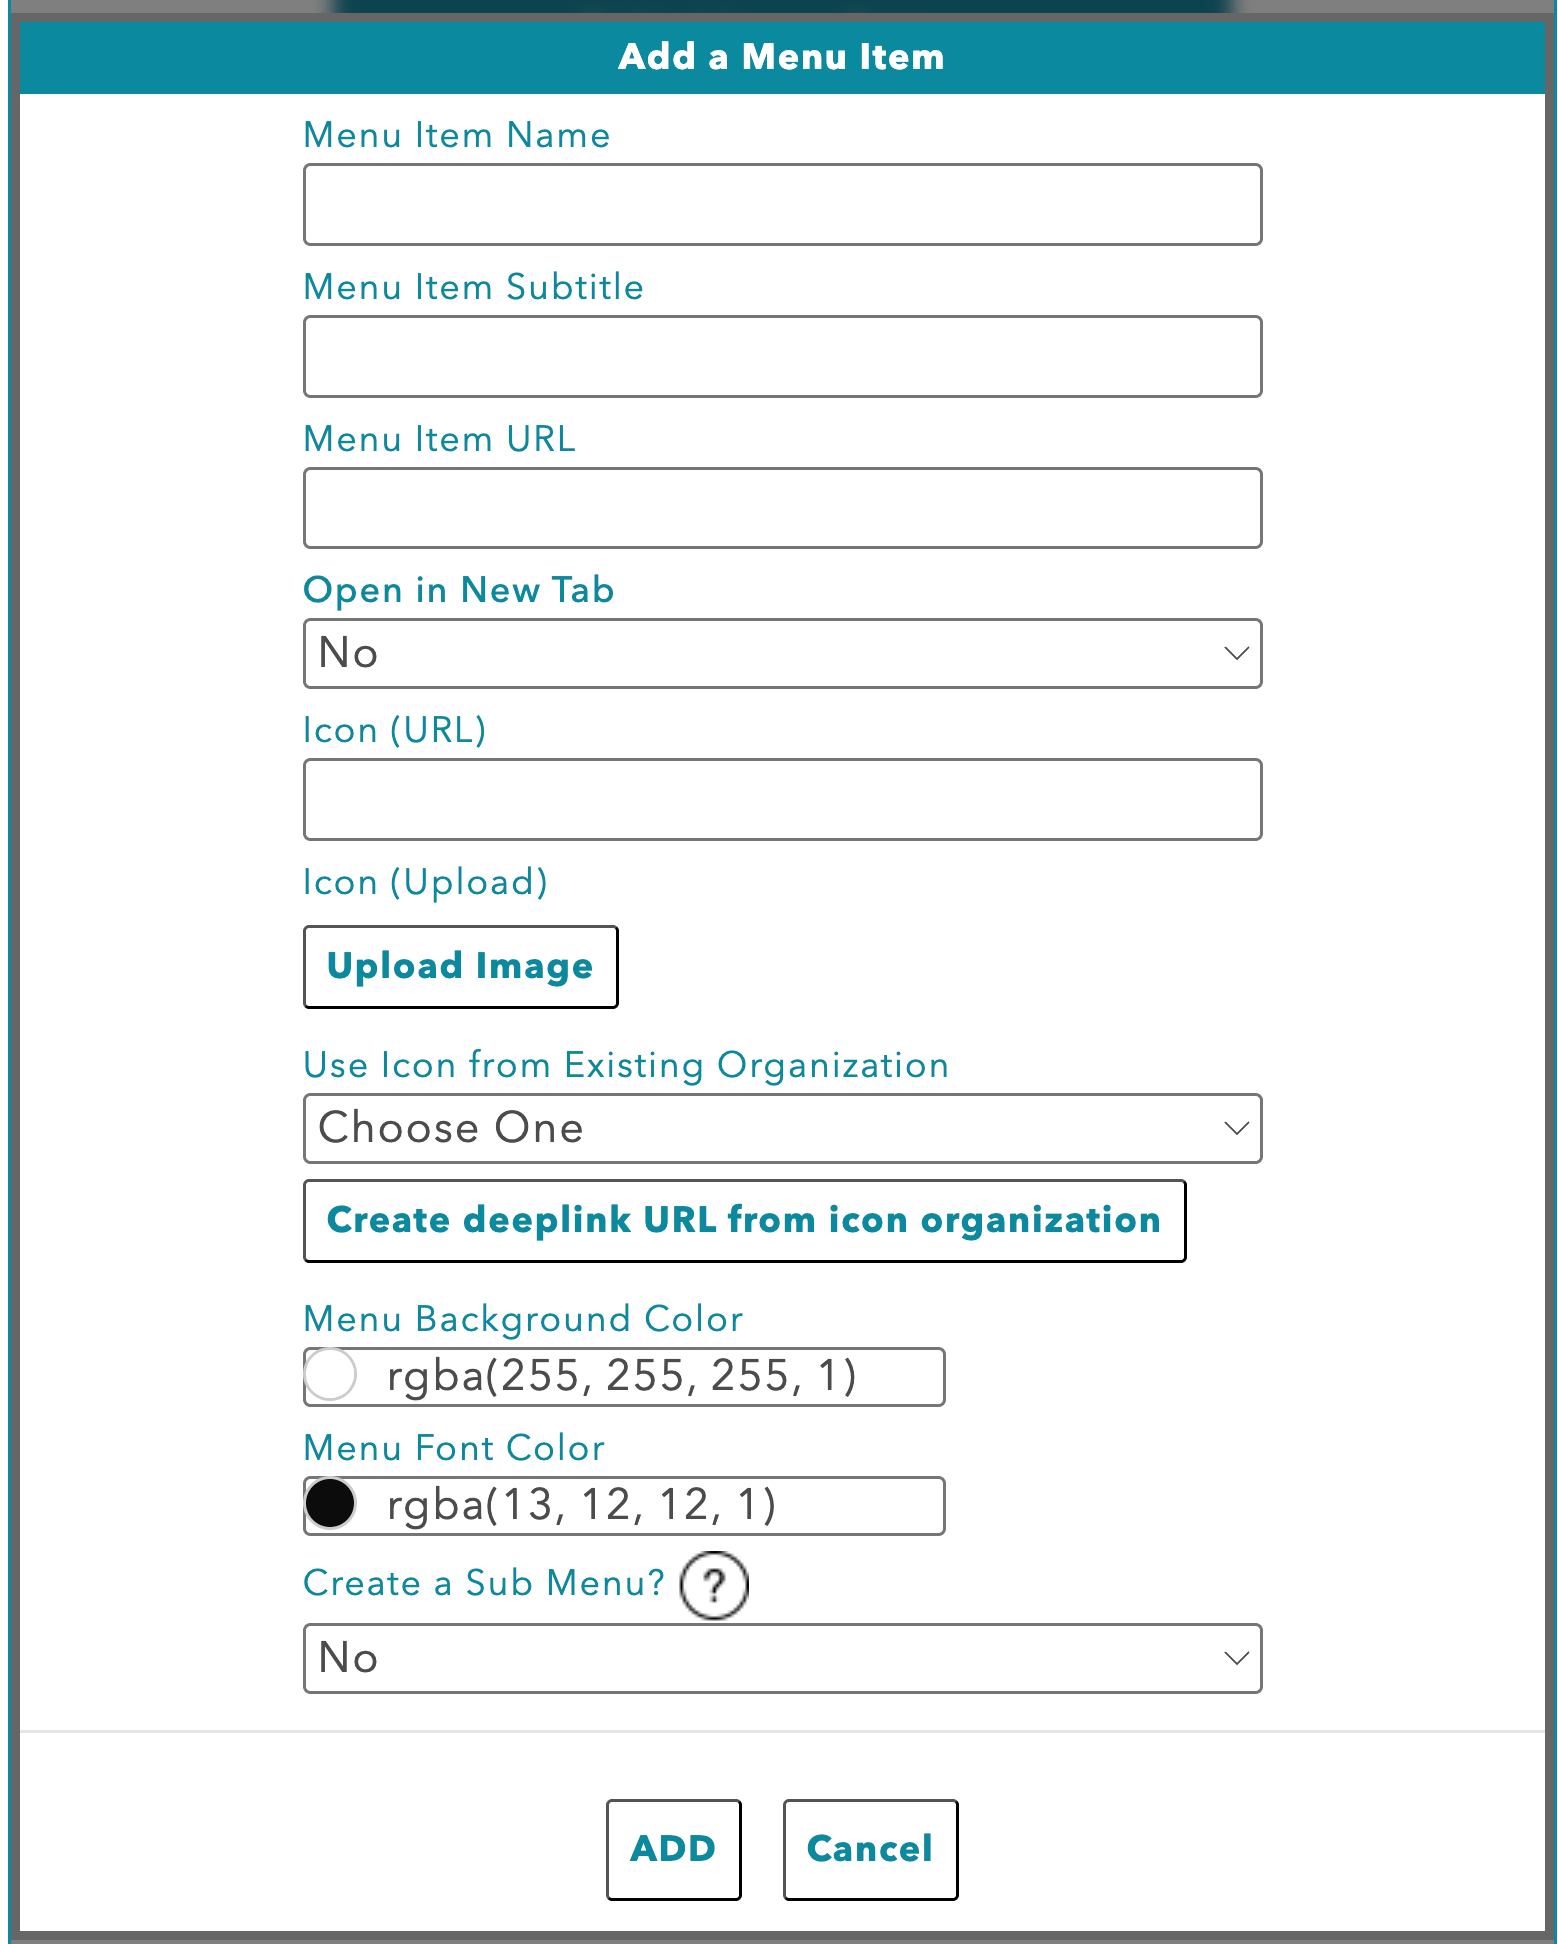
Step 3: Add your Menu Items
Select “add a menu item”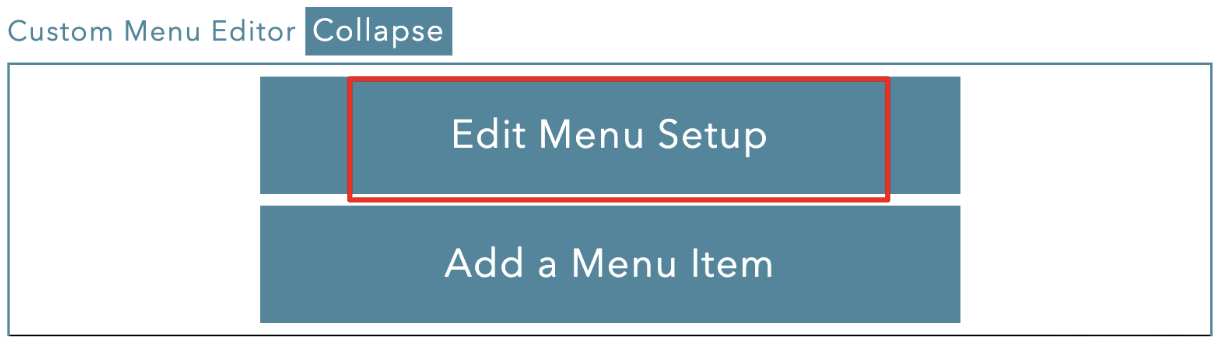
Fill in the required information…
Menu Item Name - what the user sees on the button
Menu Item Subtitle - additional text under the button (optional)
Menu Item URL - Leave blank if you’re linking to driftscape content
Want to link your menu item to specific Driftscape Content? See generating deeplinks to your driftscape content for a walkthrough on creating your URLs
Open in New Tab - Set to No if linking to driftscape content or yes if linking externally
Icon URL - Add an image URL for the button Icon (optional)
Icon Upload - Upload a PNG or Jpeg for the button icon (optional)
Use Icon from Existing Organization - Leave blank if you’ve already added an icon, or choose an organization to use that icon instead
Create a Deeplink URL From Icon Organization - click this button if you want the menu item to link to the desired organization chosen in “Use Icon from Existing Organization”. This will automatically populate the Menu Item URL with a deeplink to your content
Menu Background Colour - Choose the background colour of the menu button you are adding
Menu Item Font Colour - Choose the font colour of the menu button you are adding
Create a Sub Menu - Choose yes if you want to turn this button into a dropdown with other buttons underneath
Once you’ve filled in all of your information, select “add” at the bottom of the editor popup. You can repeat this process to add all the menu items you want to include
Step 4: Create Sub Menu Items
If you’ve chosen to include sub-menu’s in your custom menu. Ensure you’ve added sub menu items to their dropdown. To do this, select the arrow icon beside the menu item.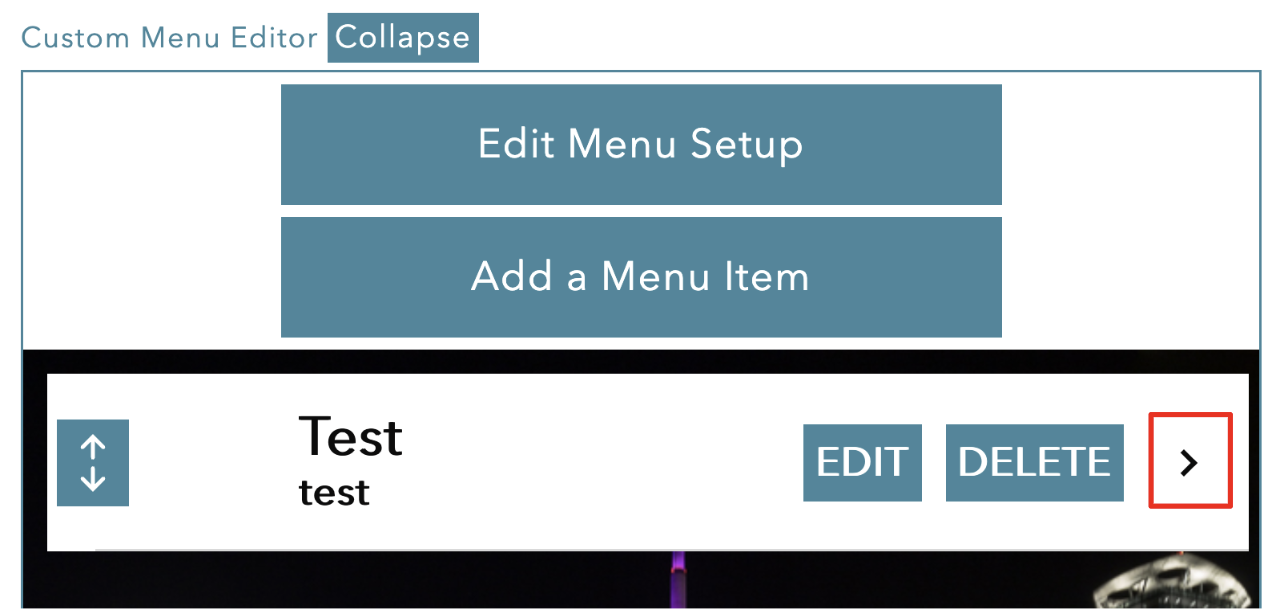
This brings you to the submenu editor page. Repeat step 3 while on this page to add sub menu items.
It’s not recommended to add submenus inside of submenus however the system will allow it.
When in a submenu editor page, you can go back to the main menu using the arrow icon on the right hand side of the menu editor.

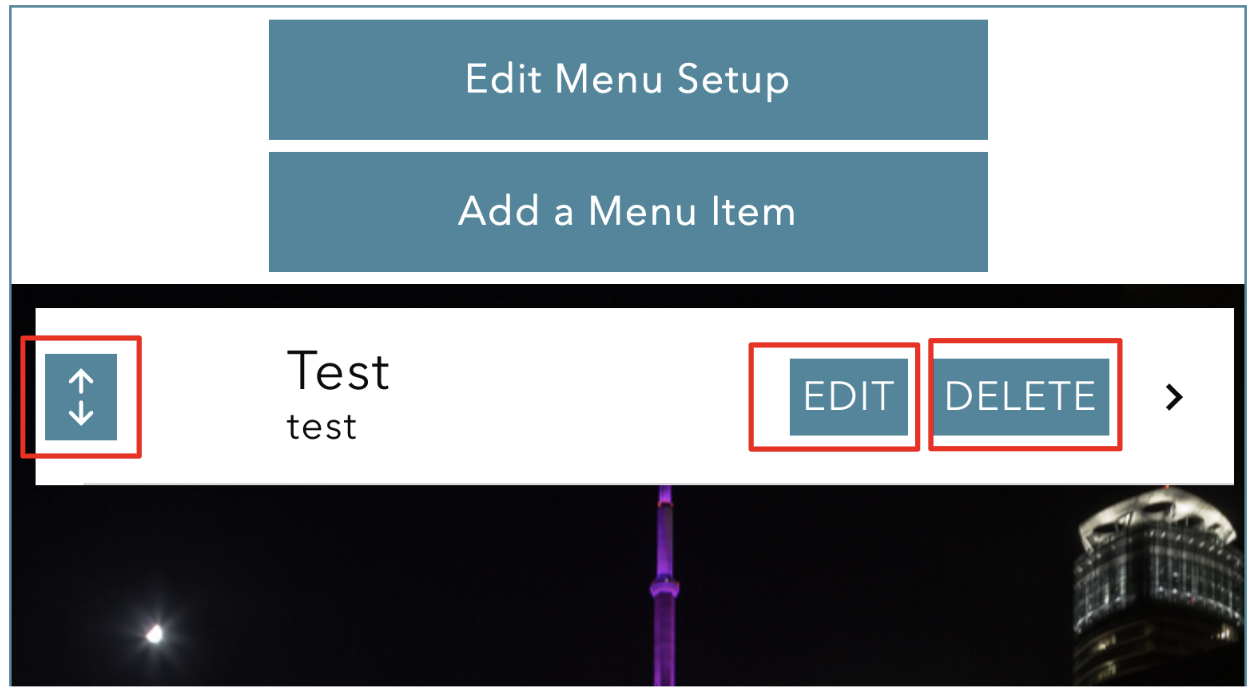
Step 5: Arrange or Delete Menu Items
All menu items can be rearranged by dragging and dropping the item, using the arrows on the right side of the column.
Menu items can be edited by clicking the edit button on that menu item
Menu items can be deleted using the delete button on that menu item (this cannot be undone)
Step 6: Publish the Menu
Once you have added all of your menu items, select the “Update” button at the bottom of the page.
This will publish the menu so users can view it in the Driftscape app.

Related Articles
Generating Deeplinks to your Driftscape Content
Editing your Organizations Properties
Was this article helpful?
That’s Great!
Thank you for your feedback
Sorry! We couldn't be helpful
Thank you for your feedback
Feedback sent
We appreciate your effort and will try to fix the article